The Basics to Exporting Your Photos to Adobe Lightroom
The Basics to Exporting Your Photos to Adobe Lightroom.
After a long day of shooting your photos, you are in the final stretch.
What else is left? Editing and exporting your photos of course! With these instructions, you will learn some easy tips and tricks when using Adobe Lightroom when editing your photos.
Exporting your photos is the key to editing because without a photo, how else are you going to edit anything?
Once you have downloaded all photos from your memory card I would suggest sorting through your “yes” and “no” photos, meaning which pictures you want to keep or delete. After you sort through and find your favorites, create a file with a title of the event or shoot you did.
This is important because, without a name on the file, it is harder to locate later on in the process.
After you have sorted through the fan favorites (and by fan, I mean you of course!) It is time to go onto Adobe Lightroom. Here is where you will be spending most of your time until those photos are done.
There are two ways to export your photos:
By clicking “Add Photos” in the top left corner which then will show you your files.

OR
By clicking the plus sign further below next to the sections “Albums” and “Shared”. After clicking the plus sign, it will drop down an option to create an “Album” or a “Folder”.
If this is the only time you will be shooting this event or person, I recommend creating just a folder. However, if you find yourself spending a lot of time shooting this specific group, event, etc. then create an album to house all your folders.
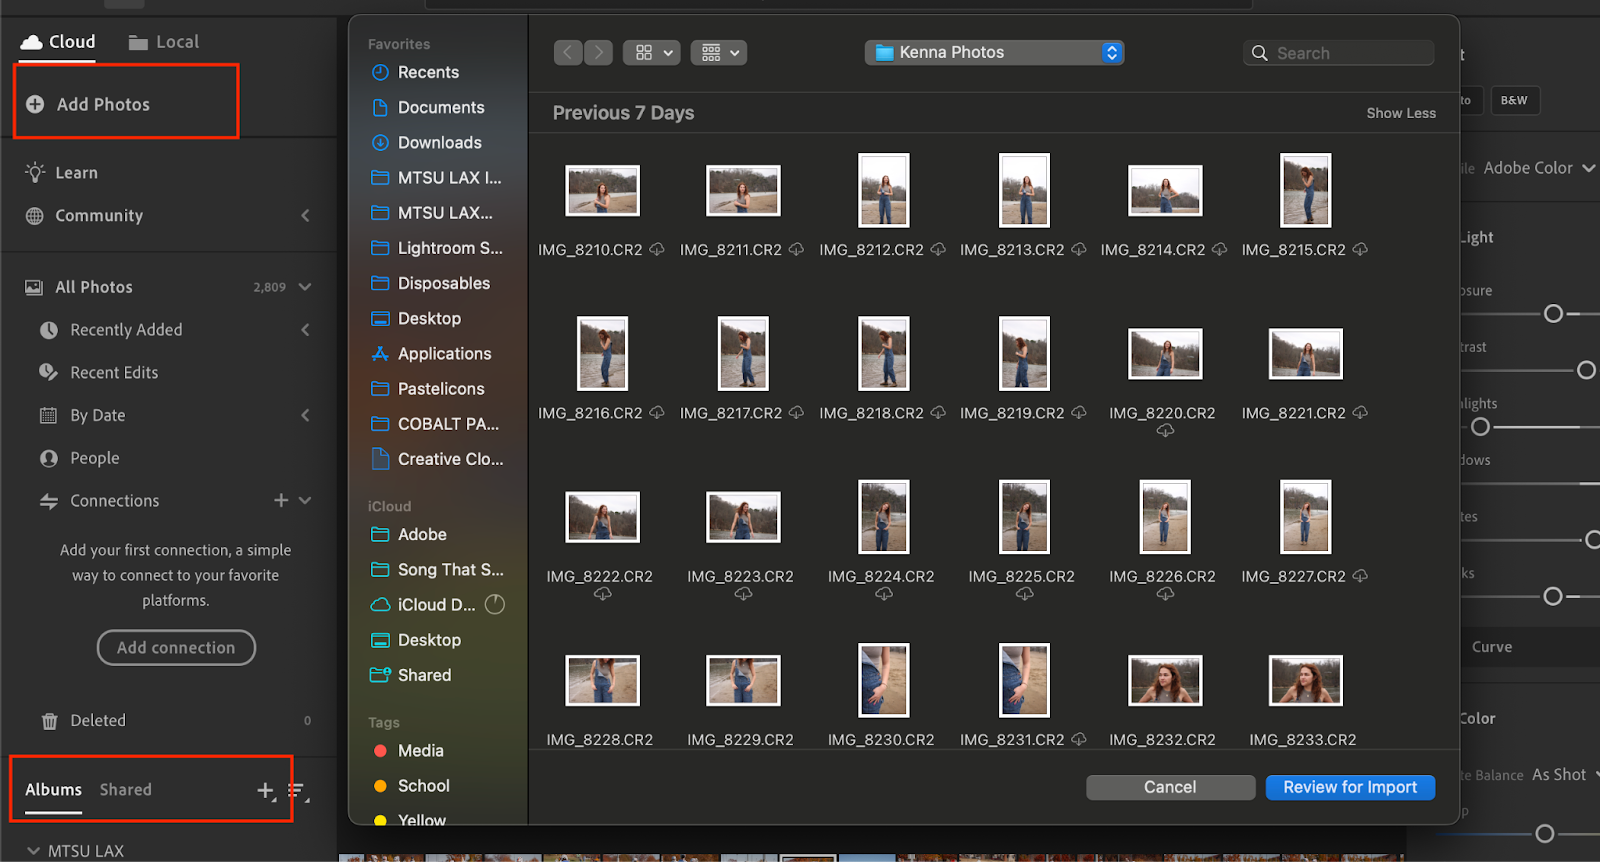
Let's say you chose the first option, once you click “add photos” it will display your most recent files added, like your photos. This is why it is important to name your files with the photos residing in them!
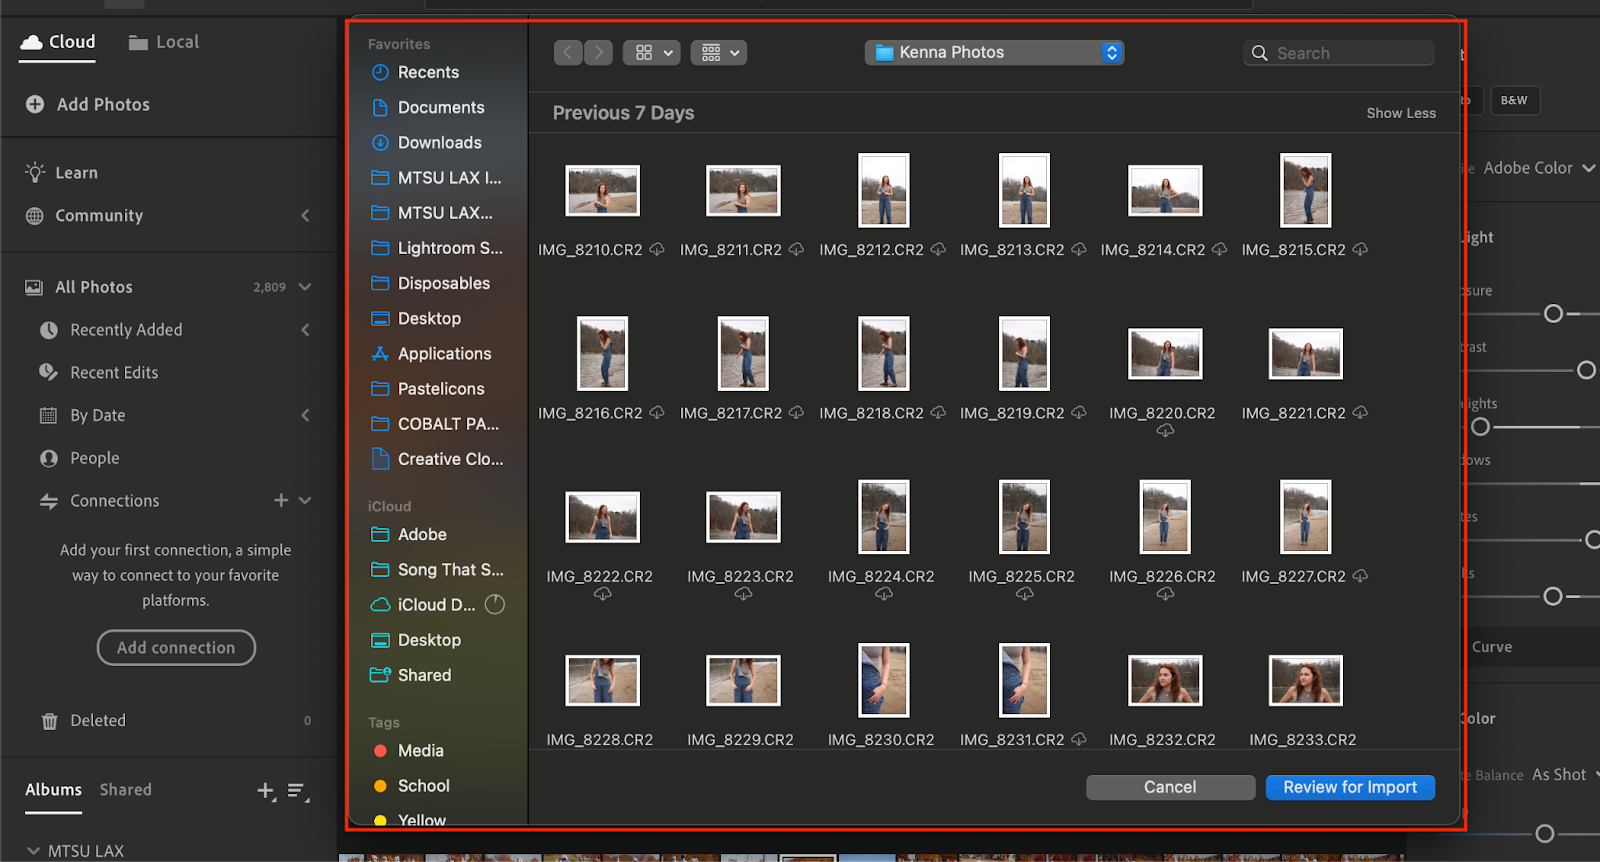
Assuming you've named your files, locate your named file and select it. Then it will show all the chosen photos, in the bottom right corner of the popup will be a “review for import” button, push that button and you are one step closer to gorgeous, edited photos!

Once those photos are imported into Lightroom there will be various sorting buttons, flags, stars, and more. These will help you filter your photos if you need to sort them specifically.
Finally, we have photos exported into Lightroom, it is now time for the fun part…editing.
We just covered the easy part, like many photographers, you have probably been staring at your screen for a bit too long. So, export those photos onto your Lightroom account and take a break from screens. Those photos are here to stay and will be waiting for you when you get back!
Happy exporting and editing!
Comments
Post a Comment